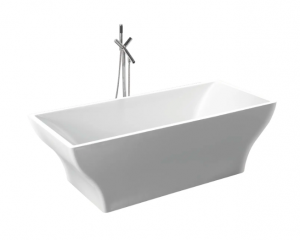
Installing a freestanding bathtub in your bathroom can add a touch of elegance and luxury to your space. These statement pieces are not only functional, but also stylish, making them a popular choice for homeowners. If you're considering installing a freestanding bathtub in your home, here's a step-by-step guide to help you through the process.
1. Measure the space: Before purchasing a freestanding bathtub, measure the area where you plan to install the bathtub. Consider the size of the tub and the clearance required around it. This will ensure that the tub blends seamlessly into your bathroom and provides a comfortable experience.
2. Prepare the area: Clear the space where the tub will be installed. Remove any existing fixtures or furniture that may impede the installation process. Make sure the floor is level and sturdy to support the weight of the tub.
3. Install the drain pipe: Determine the location of the drain pipe and mark it. Before cutting into the floor, determine the best way to connect the tub drain to your existing plumbing system. Use a reciprocating saw to cut a hole in the floor, making sure to follow the manufacturer's instructions for location and size of the drain hole.
4. Install the drain pipe: Install the drain pipe assembly according to the manufacturer's instructions. Apply plumber's putty or silicone around the drain flange to create a watertight seal. Use a wrench to tighten the drain flange, making sure it is flush with the surface of the tub.
5. Connect the water supply: Determine the location of the water supply line. If the tub doesn't come pre-drilled, mark where the faucets and handles will need to be. Install the water supply line and connect it to the tub fixture. Use plumber's tape to create a strong seal.
6. Place the tub: Carefully place the freestanding tub in the designated area. Adjust its position until it lines up perfectly with the pipe and drain connections. Make sure the tub is level and use a leveling tool to check for any unevenness.
7. Secure the tub: Once you have the tub in the desired location, secure it to the floor or wall according to the manufacturer's instructions. Use a drill and screws to install any brackets or flanges that came with the tub. This step will ensure stability and prevent any movement during use.
8. Leak test: Fill the tub with water and check for signs of leaks. Let the water sit for a few minutes, then check the area around the drain pipe and the water supply connection. If any leaks are found, make necessary adjustments to ensure proper sealing.
9. Finishing touches: Once the tub is securely installed and leak-free, apply a bead of silicone caulk around the edges for a final look. Wipe off excess caulk with a damp cloth or sponge. Allow the caulk to dry completely before using the tub.
Installing a freestanding bathtub may seem like a daunting task, but with proper planning and careful execution, it can be accomplished easily. By following these steps, you can transform your bathroom into a spa-like oasis complete with a stunning freestanding tub. Enjoy the luxury and relaxation these beautiful fixtures bring to your space.
Post time: Oct-25-2023


